Some of the worst mold we find is the kind nobody can see. That was the story at a home in Spring, TX, where what looked like a little discoloration turned into a full mold remediation project once we opened things up. Our team at Anderson Restoration has been doing this since 2002, and if there’s one lesson the work keeps teaching us, it’s that mold loves a quiet, hidden spot with a steady moisture supply.
By the time we got the call, the growth had already settled in behind finished walls and ceilings. The homeowner did the right thing, though. They picked up the phone instead of grabbing a sponge and hoping for the best.
What We Walked Into
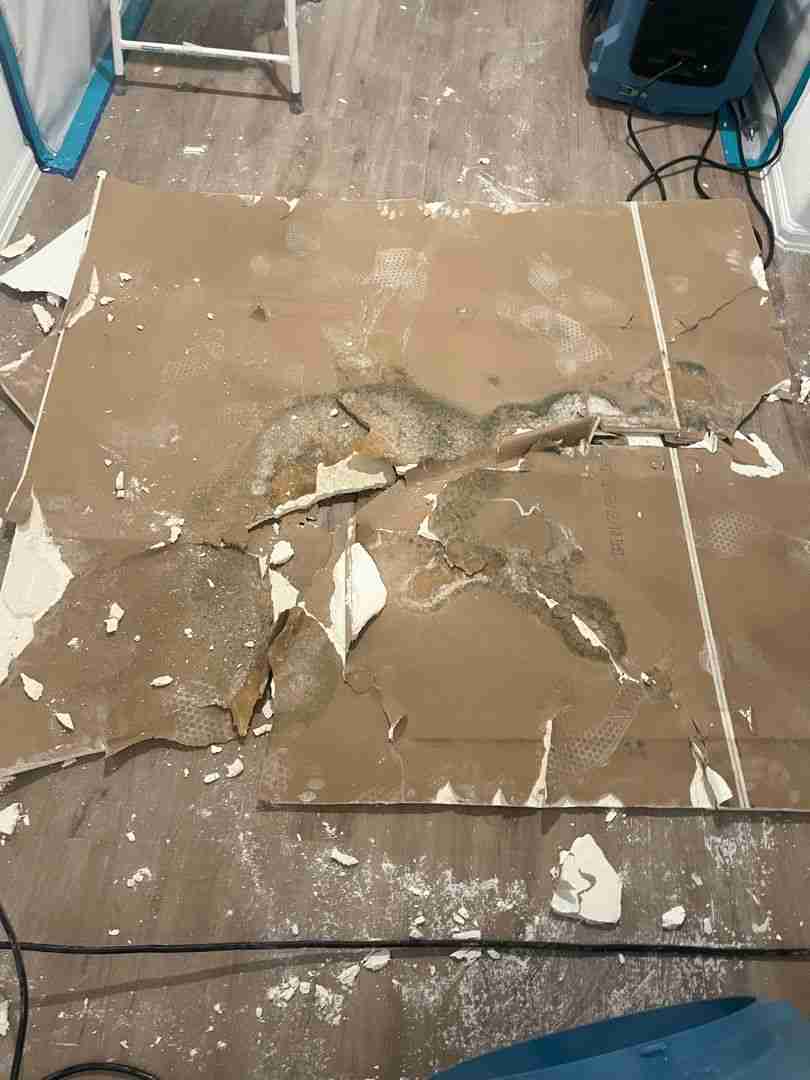
When our crew arrived, the mold had spread well past anything visible on the surface. Dark growth and staining ran across the ceiling decking, the wall framing studs, a built-in cabinet, and the trim around an interior door. That pattern told us a familiar story: moisture had been migrating quietly through the structure for a long time before anyone noticed.
Sealed behind drywall, that trapped moisture gave mold exactly what it wanted. Time, darkness, and damp wood. The affected zone reached across multiple rooms, into framing cavities, flooring transitions, and built-in millwork. Not a quick wipe-down, in other words.
Here’s what the early look revealed before any work began:
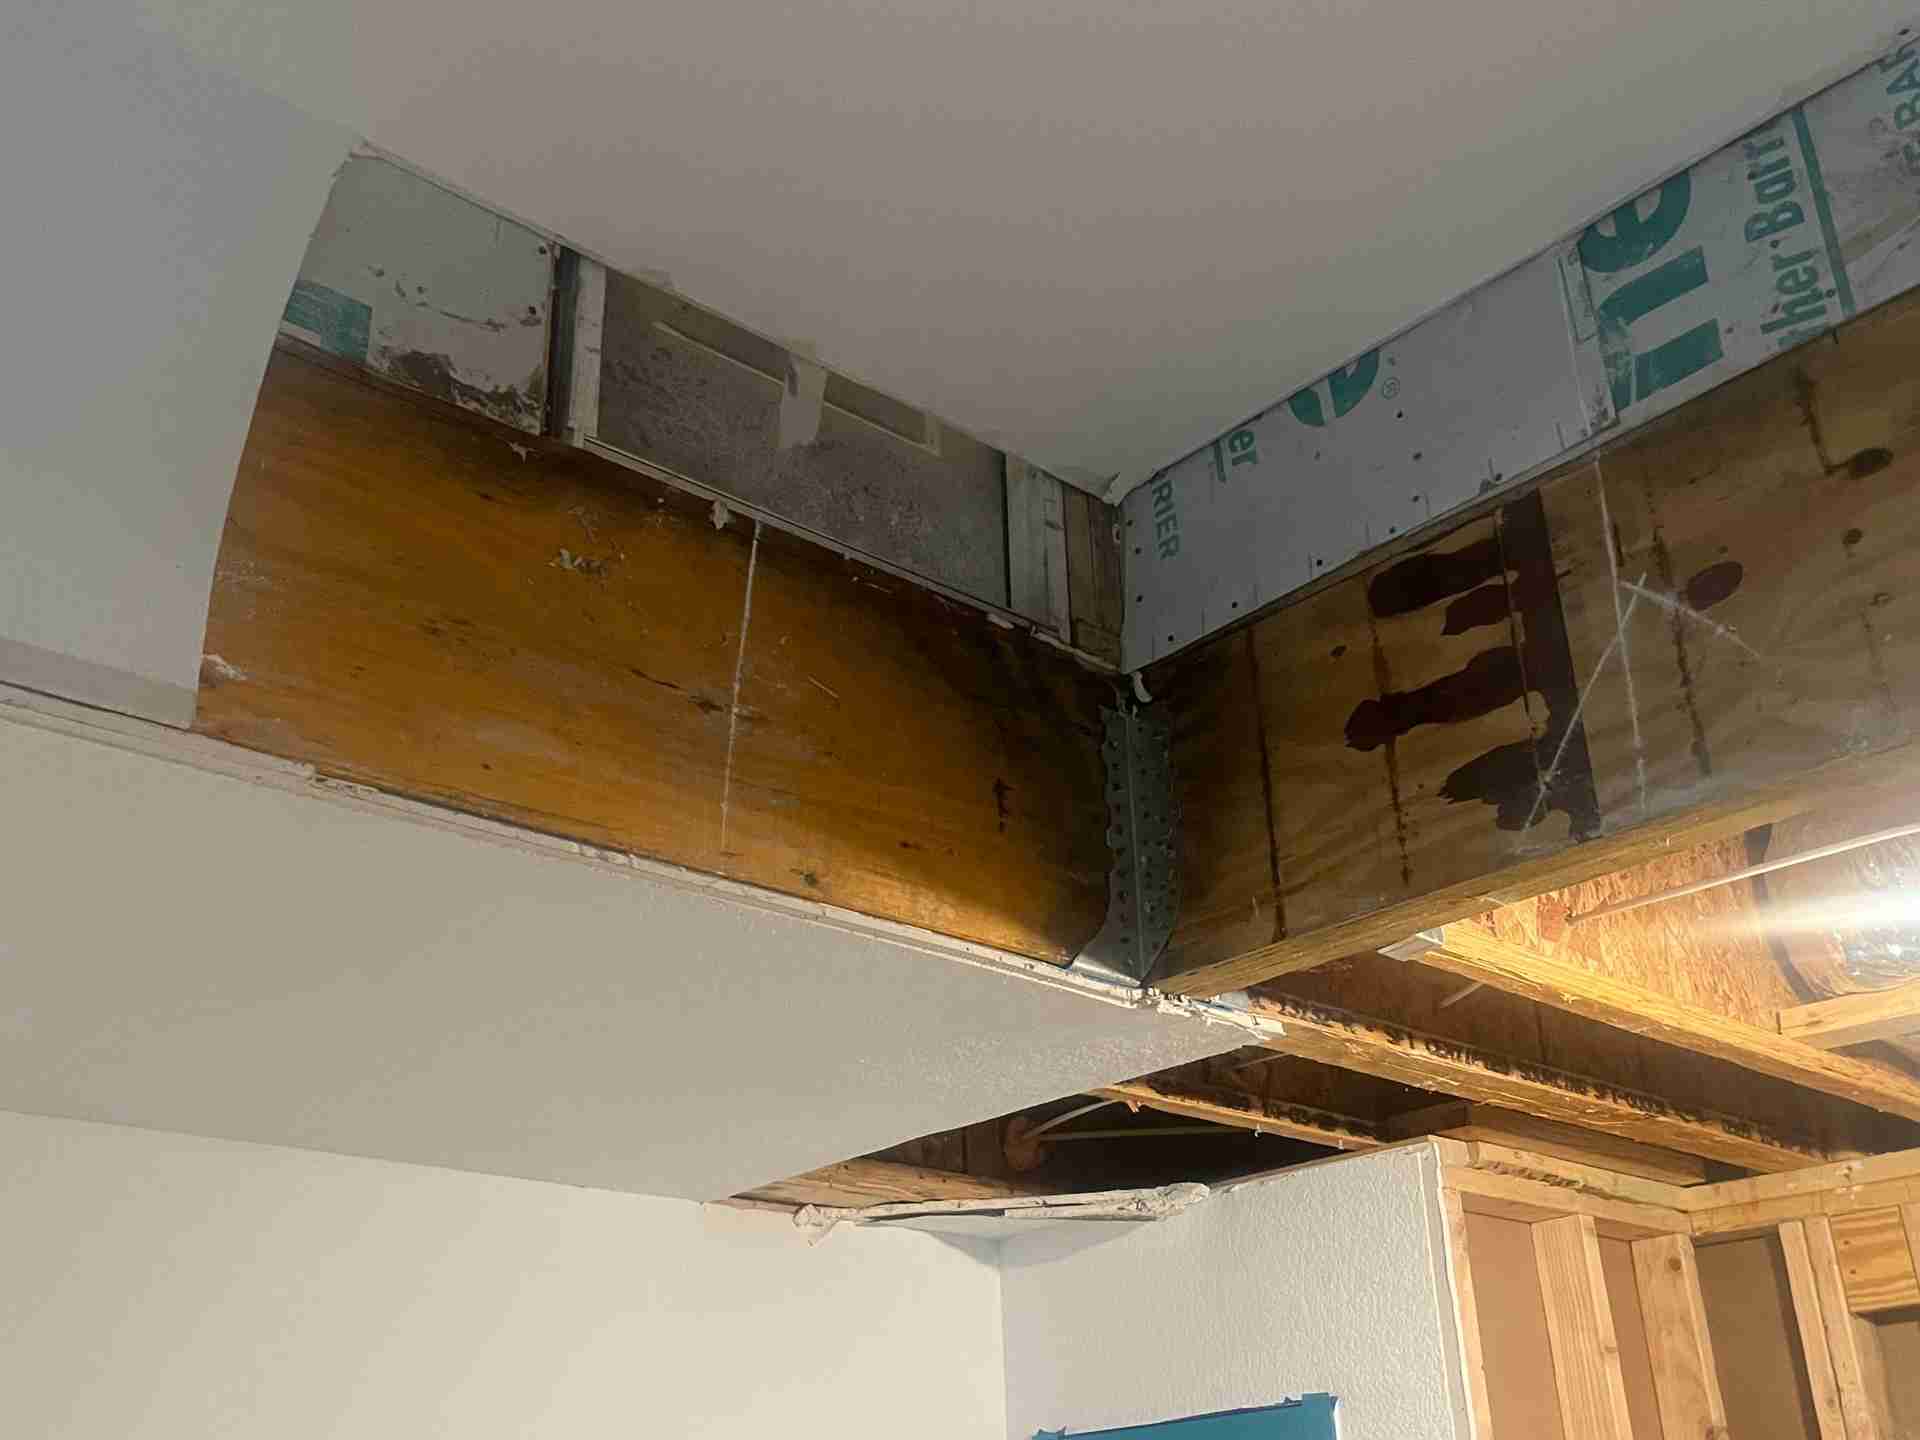 | 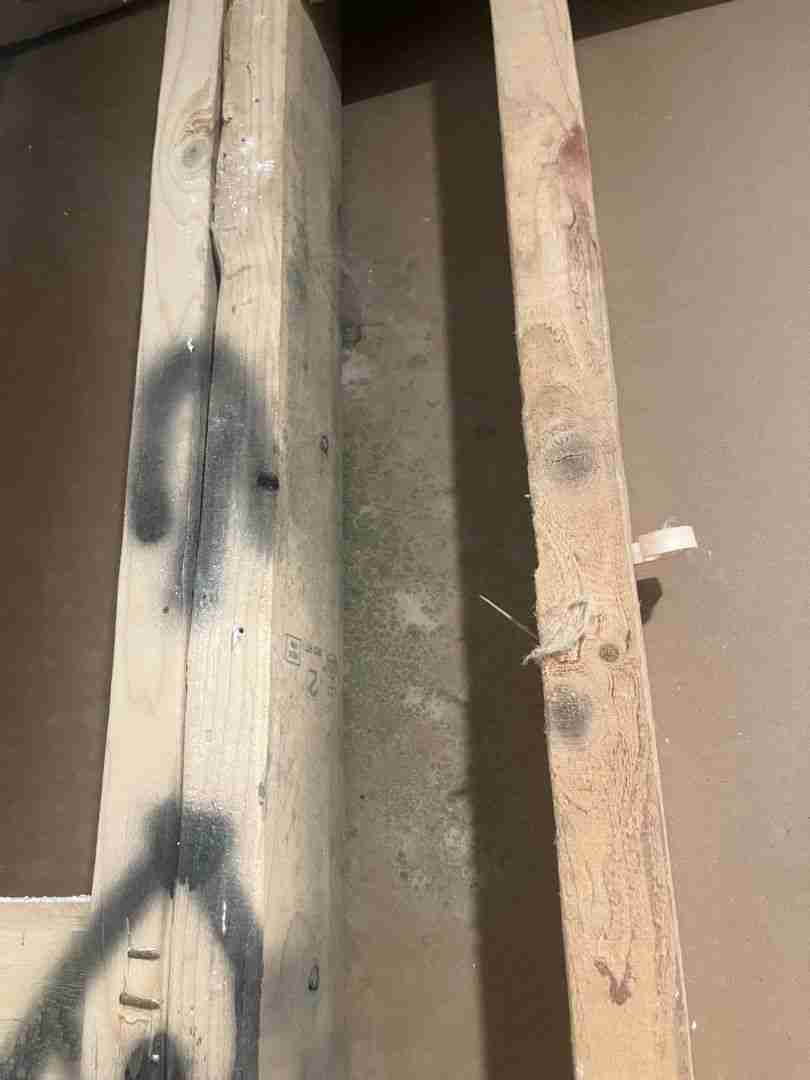 | 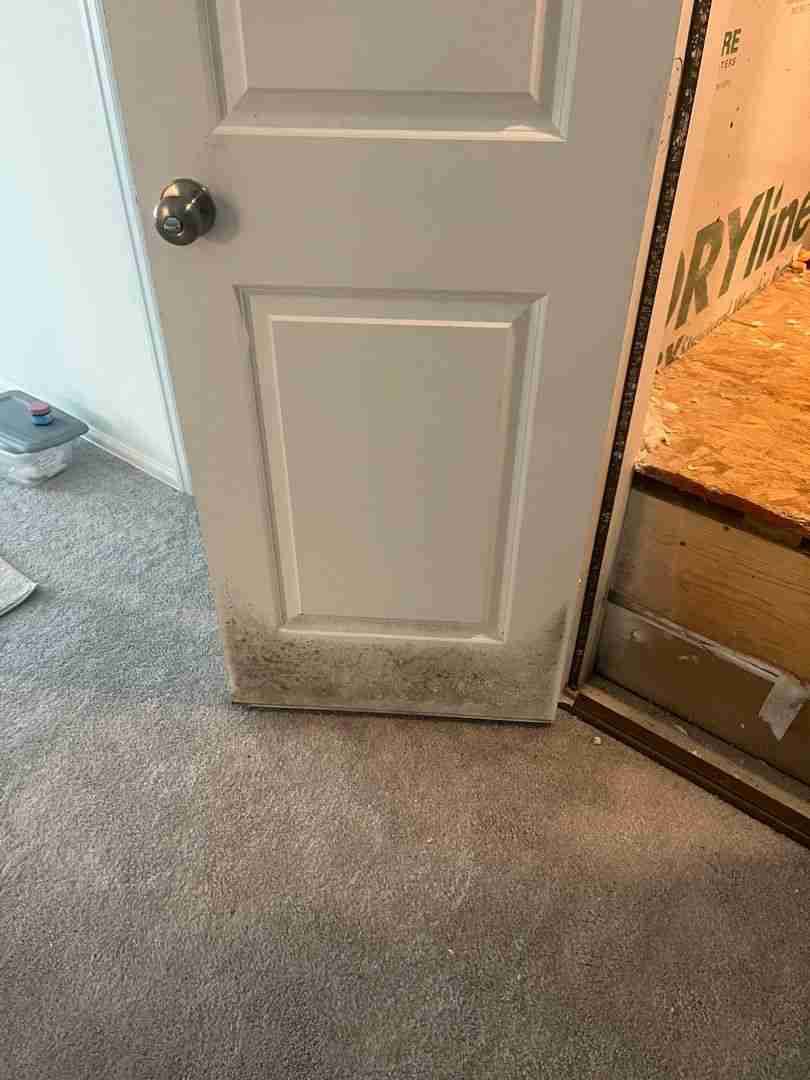 |
Before: hidden mold across the ceiling decking, framing studs, and door trim.
Why Hidden Mold Gets So Bad
Mold needs moisture, a food source, and time. Drywall, wood framing, and insulation check every box. When water sneaks in slowly and stays trapped, you can have a real problem brewing while the visible part of the room looks perfectly fine.
In our Houston Metro climate, that’s a common setup. Warm, humid air plus a slow leak or condensation issue is a recipe mold knows by heart. The EPA notes that fixing the underlying moisture problem is the only way to stop mold from coming right back, which is exactly how we approach every job.
A few of the usual hiding spots we check, and you can read more in our guide to hidden mold hotspots in your house:
- Wall and ceiling cavities where leaks go unseen
- Framing and sheathing behind finished surfaces
- Built-in cabinets and millwork that trap humidity
- Trim and baseboards near slow, steady moisture
If you’ve ever wondered how quickly this happens, our team broke it down in how fast mold grows after a water leak. Spoiler: faster than most people expect.
How Our Team Handled It
We started by setting up containment to seal off the work zone and keep spores from drifting into clean parts of the home. That first step matters more than people realize. Skip it, and you can spread the problem while trying to fix it.
From there, our crew moved into controlled demolition, carefully removing mold-damaged drywall, insulation, and any compromised materials. Then came the detail work: HEPA-vacuuming and wiping down every stud and surface so nothing got left behind.
Our Step-by-Step Mold Remediation Process
- Containment: Isolate the affected rooms to protect the rest of the home
- Controlled demolition: Remove mold-damaged drywall, insulation, and materials
- Cleaning: HEPA-vacuum and wipe every exposed stud and surface
- Treatment: Apply antimicrobial and encapsulate the framing
- Drying: Run commercial air movers and dehumidifiers to normal moisture levels
As an IICRC-certified firm, we follow the IICRC S520 standard for mold remediation, which guides everything from containment to clearance. Here’s the middle of the project, with the structure opened up and being treated:
 | 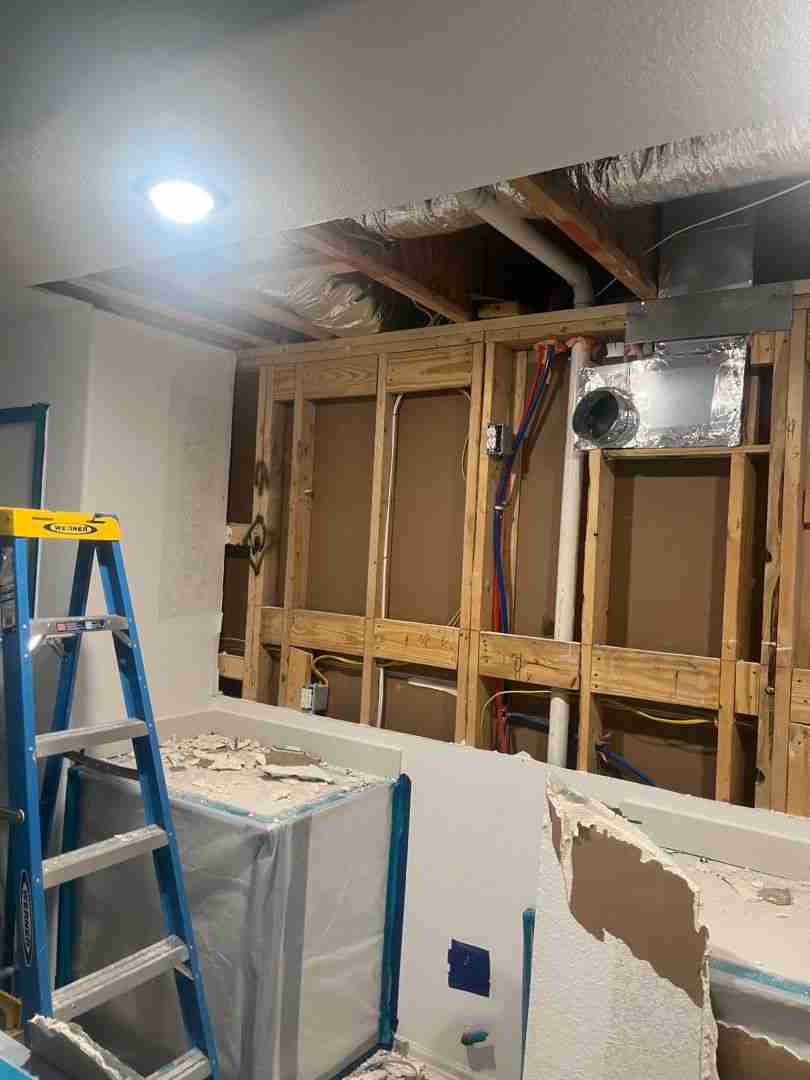 | 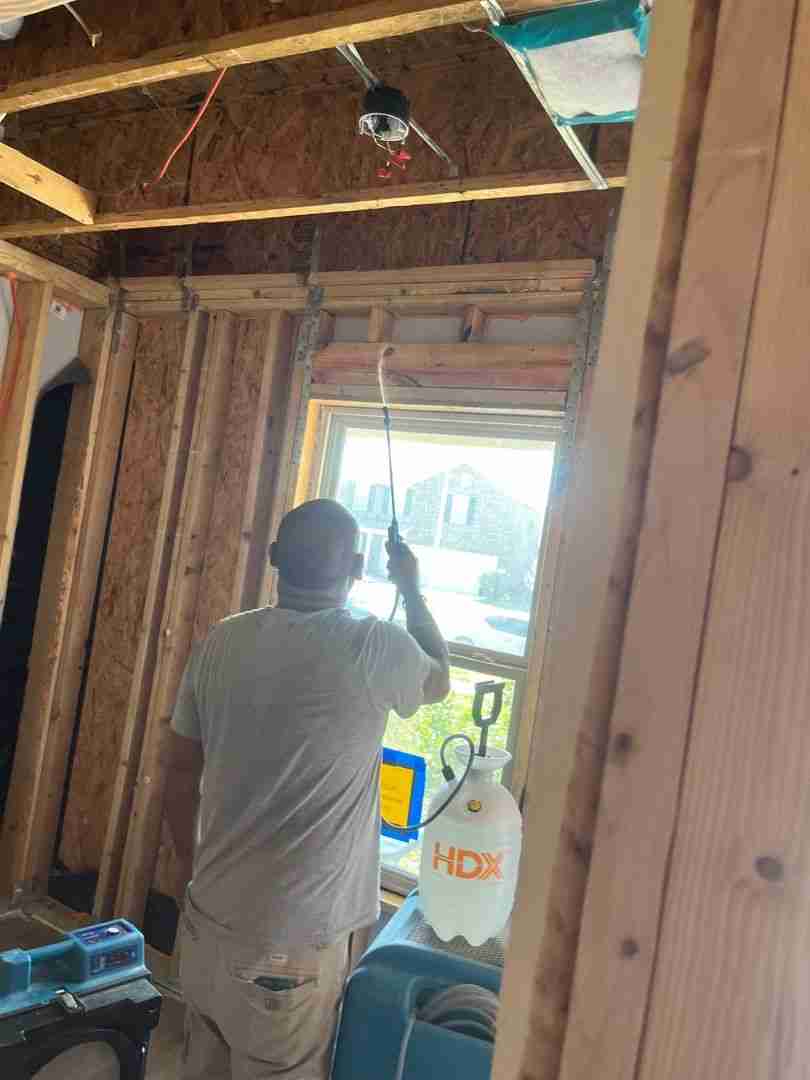 |
During: tear-out, exposed framing, and antimicrobial treatment.
Treating and Drying the Structure
Once everything was clean, we treated the exposed framing with an antimicrobial and encapsulated it to lock out future growth. Then we brought in commercial air movers and dehumidifiers to dry the structure all the way back to normal moisture levels.
Drying is the unglamorous part nobody photographs for a brochure, but it’s the step that decides whether the mold stays gone. We don’t rush it. We monitor moisture until the numbers tell us the structure is truly dry, not just dry to the touch.
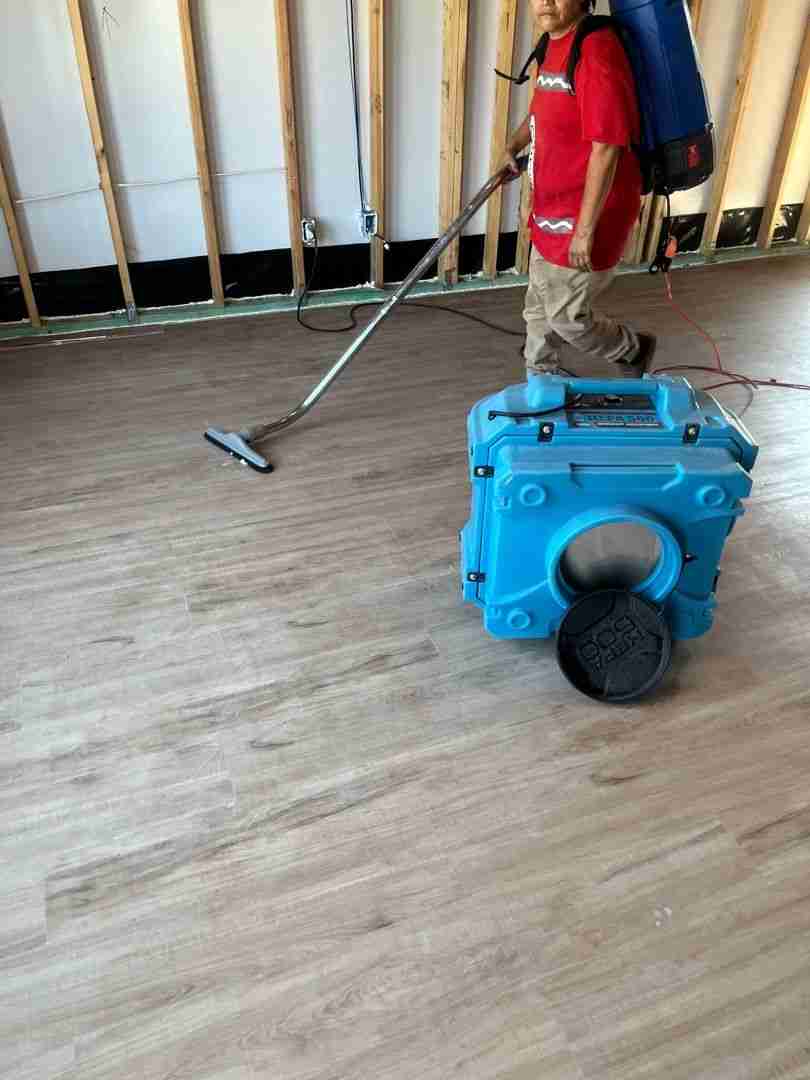 | 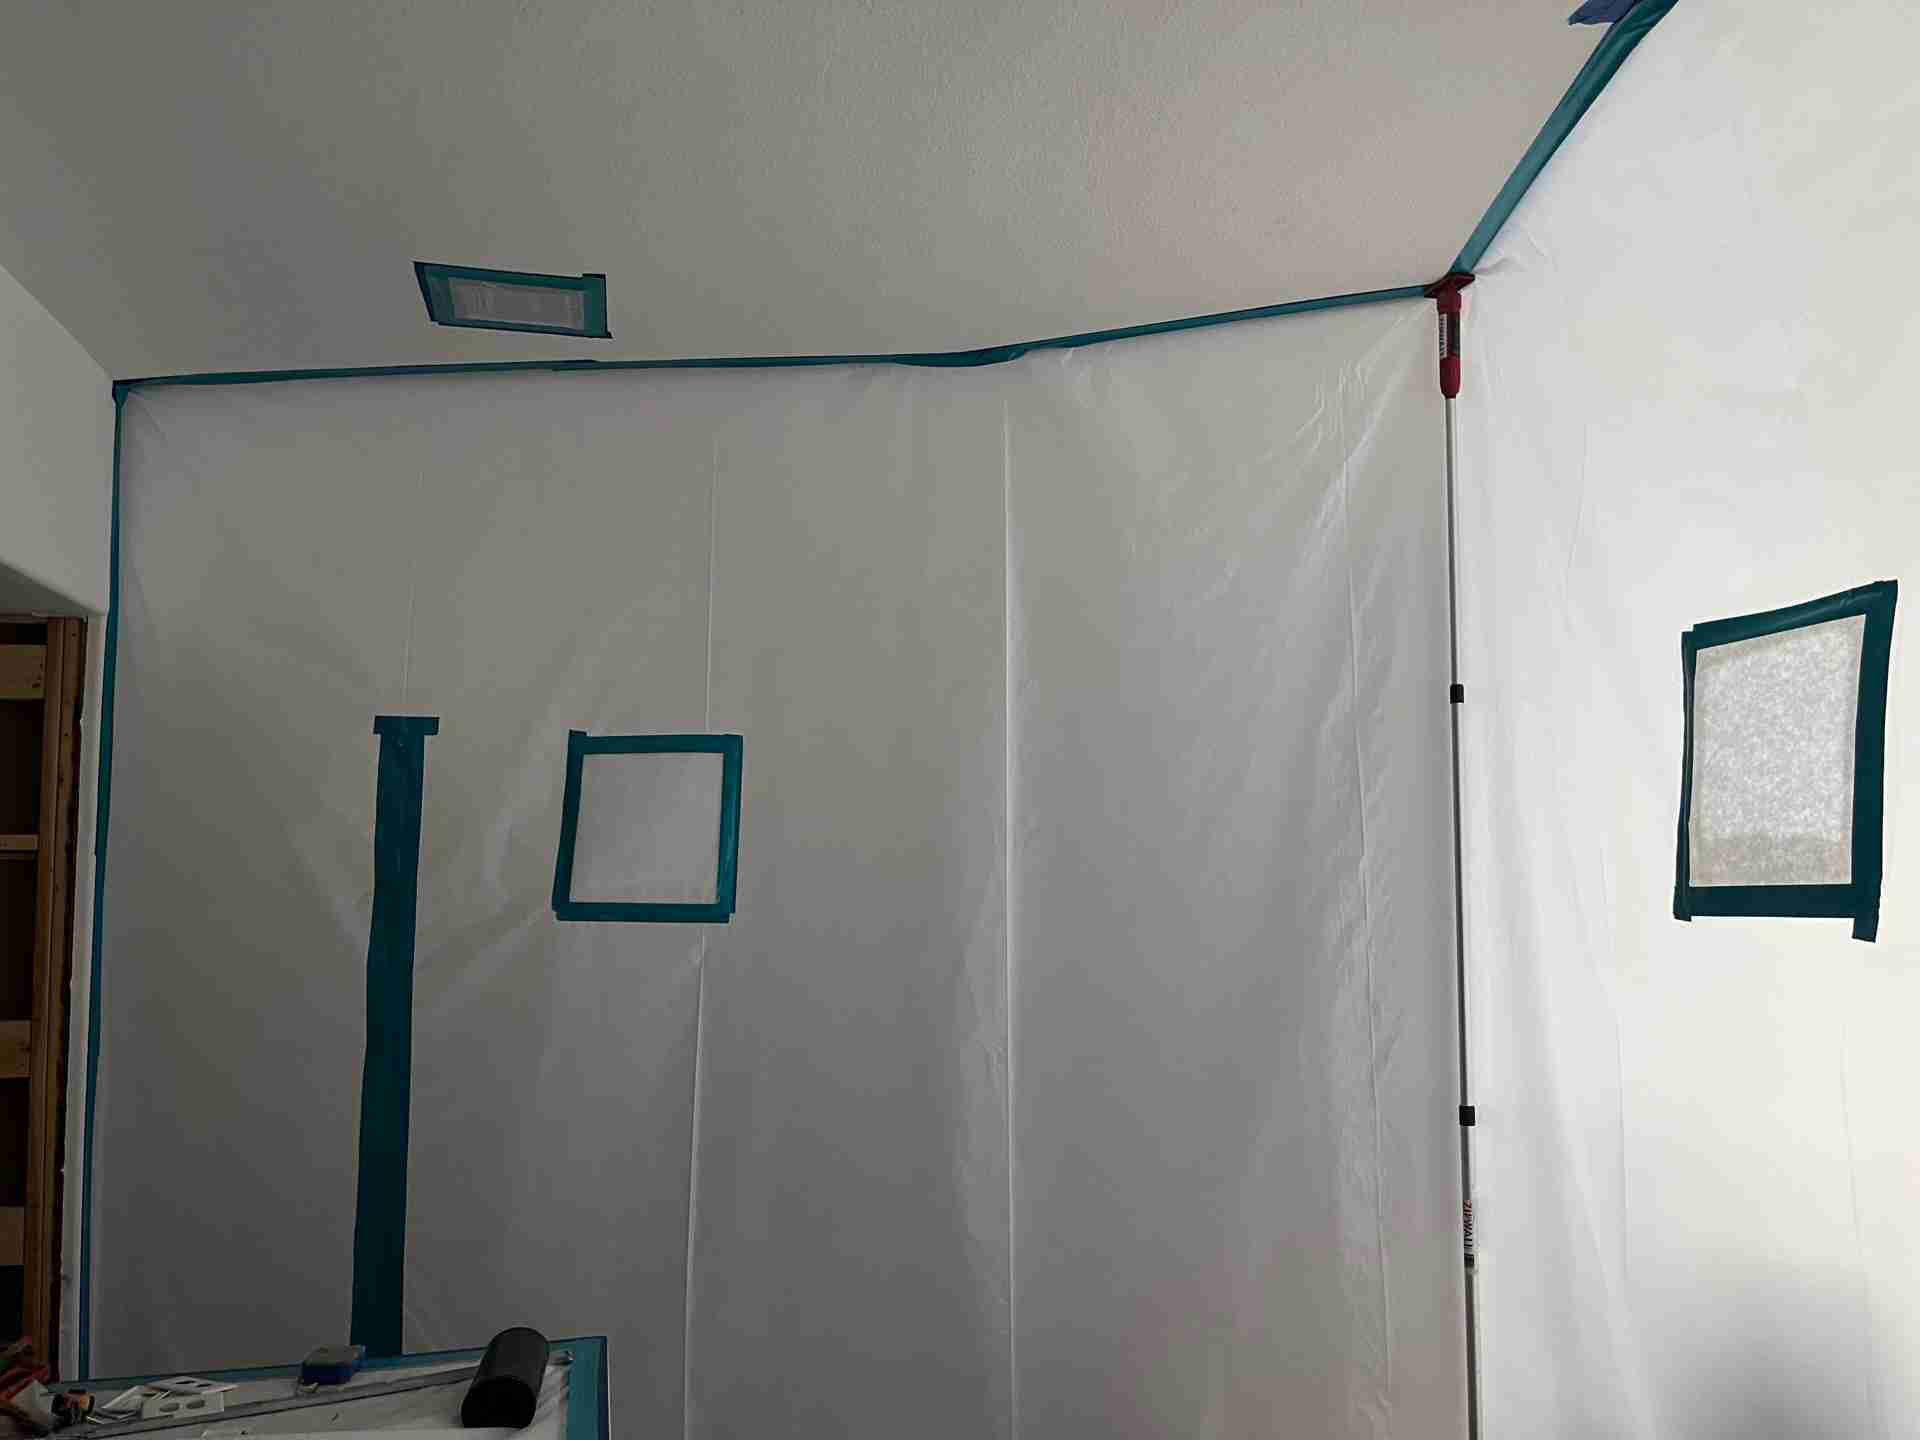 | 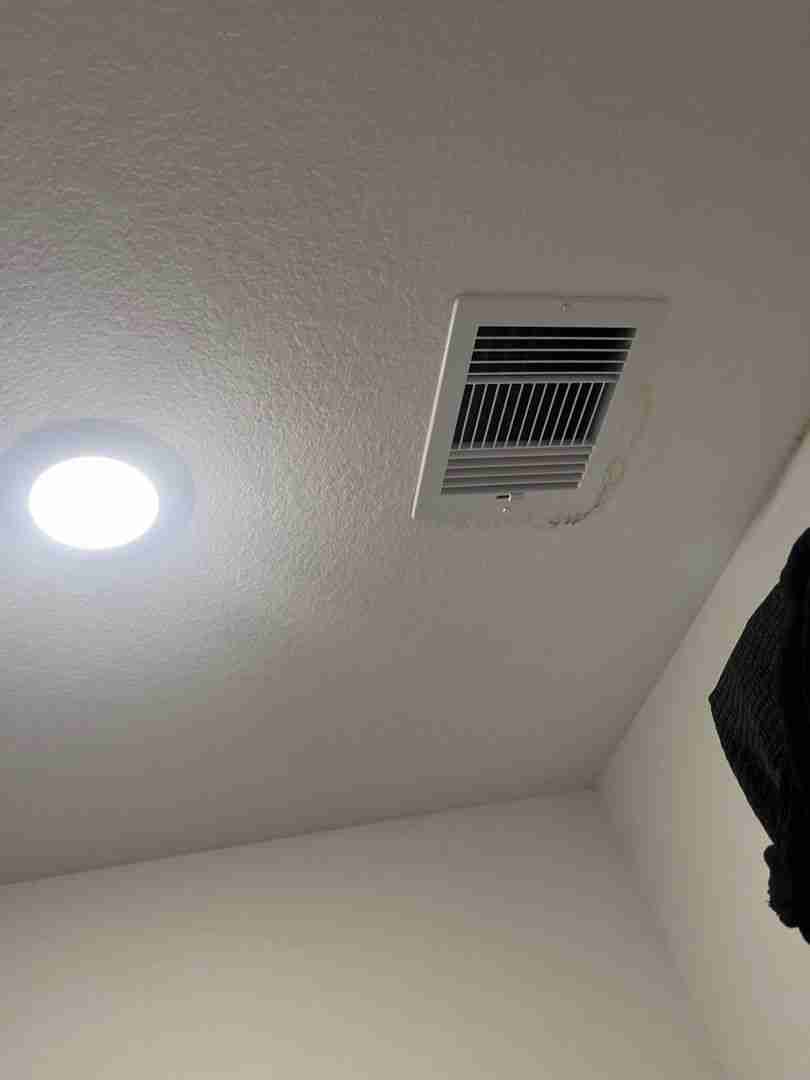 |
After: dried, sealed, and a clean, mold-free ceiling.
The Result
What we handed back was a clean, fully dried, mold-free shell. Treated, sealed, and structurally sound, ready for reconstruction. The hidden problem that had been quietly spreading for who knows how long was finally gone for good.
If you’re seeing staining, a musty smell, or signs that something’s off behind your walls, don’t wait it out. The earlier we catch it, the less we have to remove. You can learn the warning signs in our piece on the top signs you need mold remediation.
Worried About Mold in Your Home?
Our family-owned, IICRC-certified team has served the North and West Houston Metro since 2002, with 24/7 emergency response and an average arrival within 60 minutes. If something doesn’t smell or look right, we’re ready to help.
Dealing with a leak or water intrusion that could turn into mold? Our emergency water damage restoration team can stop the problem at the source. And if you’re local, see how we serve homeowners with full-service restoration in Spring, TX.